
1、石器时代:使用node内置模块开发web应用
介绍http、fs、path、url的常用api,并用于开发web应用。
1.1 http模块
node提供了http模块用于网络操作,其中http.Server用于搭建服务端;http.Request用于搭建客户端。作为web应用开发,主要介绍http.server。http.server常用事件及用途如下:
request:当客户端请求到达时触发此事件,回调函数有两个参数request和response表示请求和响应的信息;connection:当tcp建立连接的时候,该事件被触发。回调参数socket是net.socket的实例;close:当服务器关闭的时候触发。
还有一下不常用的事件checkContiue、upgrade、clientError
1.1.1 创建一个web服务器
1 | // 引入 http 模块 |
1.1.2 监听request事件
1 | // 引入 http 模块 |
1.1.3 在80端口守候请求
1 | // 引入 http 模块 |
使用node命令运行代码所在的文件,在浏览器访问http://localhost,效果如下:
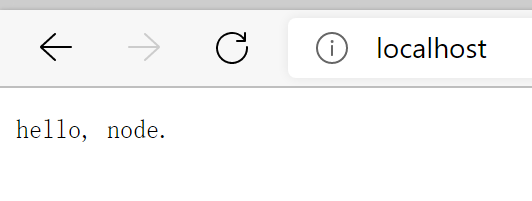
至此,一个简易的web服务器已经运行起来了。
node也为我们提供了http.createServer用来简化操作,代码如下。
1 | const http = require('http') |
下面我们来获取GET请求的URL的查询字符串参数。
1.1.4 获取GET请求的参数
参数req是http.ServerRequest的实例,保存了所有的请求信息,其中req.url属性保存了请求的url包括查询字符串。我们使用console.log(req.url)打印一下这个属性。在浏览器访问http://localhost/ap?id=4的req.url输出如下
server running at http://localhost
/ap?id=4
因此,我们可以通过截取?后面的一段字符串,将其转换为对象,并赋值给req.query代码如下:
1 | // 监听request事件 |
在浏览器访问http://localhost/ap?id=4结果如下:
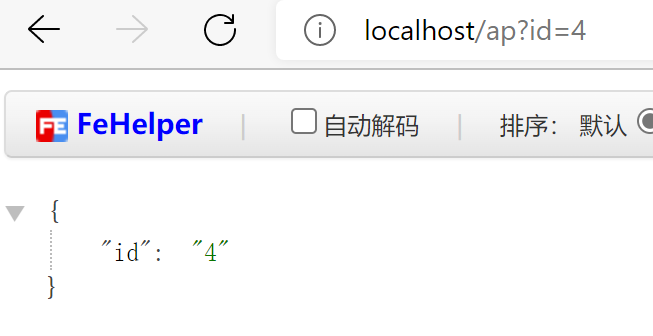
我们也可以使用url模块提供的parse方法对url进行解析,可直接获取到query。url.parse(urlStr[, parseQueryString][, slashesDenoteHost])接收3个参数:
- urlStr: string,待解析的url,必须;
- parseQueryString: boolean,是否解析query字符串,可选,默认为false;
- slashesDenoteHost: boolean,是否以斜线解析主机名,可选,默认为false
示例代码如下:
1 | // 引入url模块 |
注:此方法已被弃用,请使用 URL 类new URL(urlStr)
1.1.5 获取POST请求参数
req对象上没有任何一个属性包含了POST请求的数据,因为POST请求体可能包含大量的数据,耗费时间以及服务器资源。所以node不会解析请求体,需要手动处理。req有三个事件:
- data:当请求体到来时触发,回调参数只有一个,为接收到的数据;
- end:当请求体的数据发送完时触发;
- close:当请求结束时触发,用户强制结束也会触发。
实例代码如下:
1 | // ...... |
2、刀耕火种:实现一个简易的路由模块
通过以上的操作,我们有了一个最基本的web服务器,它可以处理GET、POST请求。但我们的web服务器目前还不能区分不同的请求,不论输入什么url返回的结果都是一样的,现在让我们来增加这一功能。
我们希望访问/路径时访问首页,访问/about时访问关于页,每条路径都有自己不同的处理逻辑。
2.1 单文件版router
使用一个对象routes来记录请求的url以及相应的处理函数。实现一个match函数来比较请求的url与已注册的路由。
2.1.1 实现match函数
在项目目录下新建一个router.js的文件,并写上如下代码:
1 | // router.js |
2.1.2 使用router
在server.js中引入router.js并作为http.createServer(router)的回调函数,示例代码如下:
1 | const http = require('http') |
在浏览器访问http://localhost/about和http://localhost/su结果分别如下所示:
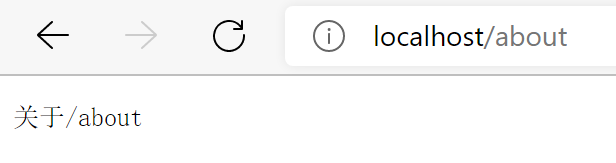
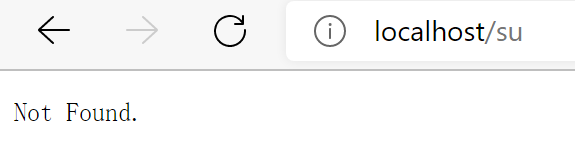
2.2 实现路由注册函数
现在我们实现了一个基本的路由模块,它可以处理不同的请求,但还不能很好的区分请求的方法,对于同一个url不论是GET还是POST请求,对应的都是同一个处理函数。下面我们来实现get、post、put、delete四个路由注册函数。
2.2.1 实现GET方法
将router.js文件中的“添加路由记录”删掉,在match函数上实现一个GET方法。现在router对象的每一个属性都是一个对象,其中应有1到4个属性,即对应get、post、put、delete请求的处理函数。结构如下所示:
1 | const router = { |
在match函数下方实现get方法,代码如下:
1 | // 实现get方法 |
2.2.2 实现POST方法
同理,在get的下方实现POST的代码:
1 | // 实现POST方法 |
2.2.3 实现put方法
1 | // 实现put方法 |
2.2.4 实现delete方法
1 | // 实现delete方法 |
2.2.5 修改match函数以支持不同方法的请求
req对象上有一个method属性,req.method保存了请求的方法,通过Object.hasOwnProperty(req.method)来判断相应的url下面是否注册过req.method这个方法,如果注册过就调用注册的处理函数,没有返回一个method xxx is not allowed.代码实现如下:
1 | // 路由匹配函数 |
2.2.6 使用注册函数注册路由
在项目目录下新建一个registerRouter.js的文件,用于路由注册,注册如下几条路由:
1 | // 引入路由 |
2.2.7 使用路由
在server.js中引入注册的路由。也可以只引入registerRouter.js要求在registerRouter.js导出module.exports = router,在server.js中将registerRouter.js的导出作为http.createServer(router)的handler
1 | const http = require('http') |
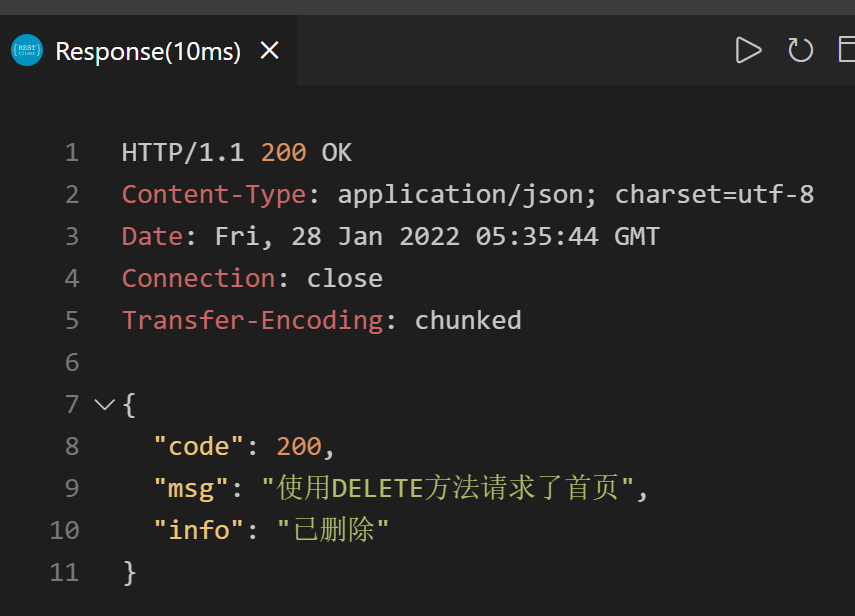
使用api测试工具,使用delete方式访问http://localhost/about结果如下:
2.3 支持路由分层
到现在,我们的路由已经足够使用了,可以处理不同的url,不同的请求方法。但在实际开发中,往往会对路由分层,所谓分层,就是根据业务逻辑提取公共前缀。例如用户注册的路由/user/register、用户登录的路由/user/login都有/user前缀,因为注册和登录都发生在用户实体上。如果有多条路由就需要重复写/user,为了方便,我们抽离公共前缀,路由注册方法里不再提供前缀,实现一个router.use('/user', userRouter)方法来使用路由,以支持前缀。
2.3.1 模块化Router
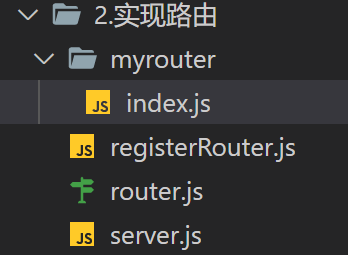
为了方便项目的开发,我们将Router模块化,在项目目录下新建一个myrouter的文件夹,在myrouter下新建index.js文件,并将router.js的代码复制到./myrouter/index.js文件。
目录结构如下:
- 将
get、post、put、delete方法修改为独立的函数实现,代码如下:
1 | // ./myrouter/index.js |
- 在match函数上实现一个router方法,作为一个构造函数,注册路由之前,需要使用这个构造函数创建一个对象,
get、post、put、delete方法都挂载在这个对象上。
1 | // 实现router构造函数 |
get、post、put、delete方法注册路由时不在把路由挂载到router对象上了,应当挂载到match.router()方法返回的对象上,对get、post、put、delete方法做出以下修改,以get为例,代码如下:
1 | // ./myrouter/index.js |
- 实现路由加载的
match.use(prefix: string, router: ReqMethod)方法:
1 | // ./myrouter/index.js |
- 使用改进版Router
- 在项目目录下新建routes文件夹,这是项目路由的文件夹,里面的每一个文件都是一个路由注册文件,在routes文件夹下新建一个
user.js文件,注册如下路由
1 | // ./routes/user.js |
- 在
server.js文件中引入myrouter/index.js和routes/user.js,并使用myrouter.use('/user', user)加载user路由
1 | const http = require('http') |
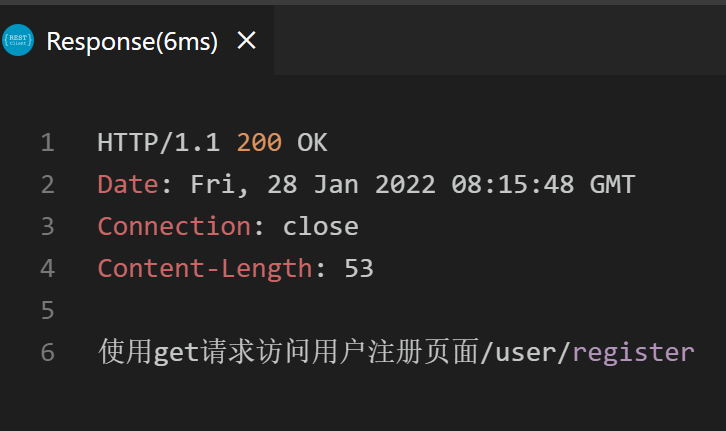
- 使用get请求访问
http://localhost/user/register结果如下:
3、青铜时代:让路由支持中间件
4、现代化:使用express框架
4.1 创建WEB服务器
- 使用
npm引入express
1 | npm install express --save |
- 新建一个项目,在项目目录下新建一个
app.js文件,在app.js中引入express
1 | const express = require('express') |
- 创建一个web服务器
1 | const app = express() |
- 注册一条路由
1 | app.get('/', (req, res) => { |
- 在80端口监听
1 | app.listen(80, () => { |
完整代码如下:
1 | // 引入express |
4.2 路由
4.2.1 创建路由
使用
app.get()、app.post()、app.put()、app.delete()方法可以创建相应请求方法的路由,支持的方法完整列表见[Routing methods](Express 4.x - API Reference - Express 中文文档 | Express 中文网 (expressjs.com.cn)),每个方法都接收两个参数,均为必须。参数一:要注册的路由URL;
参数二:对应的处理函数,这个回调函数也有两个参数:
- 参数一:request;
- 参数二:response
下面以
post方法为例注册一条路由。1
2
3app.post('/login', (req, res) => {
res.send('login ok!')
})注:若要使所有的请求方法都有相同的处理函数可以使用
app.all('/xxx', handler)使用
app.route('/su').get((req, res) => {})方式注册路由,app.route()支持链式调用1
2
3
4
5
6
7
8
9
10app.route('/su')
.get((req, res) => {
res.send('method: get, /su')
})
.post((req, res) => {
res.send('method: post, /su')
})
.put((req, res) => {
res.send('method: put, /su')
})使用
express.Router()方法创建一个路由器router,路由器相当于小型的app,可以使用router.get()、router.post()、router.use()等方法。新建一个user.js的文件,写上一下代码:1
2
3
4
5
6
7
8
9
10
11
12// user.js
// 引入express
const express = require('express')
// 创建router
const router = express.Router()
// 注册路由
router.get('/register', (req, res) => {
res.send('register ok.')
})
router.post('/login', (req, res) => {
res.send('login ok.')
})在
app.js中引入user.js并注册路由1
2
3
4
5
6
7
8
9// app.js
const express = require('express')
const user = require('./user.js')
const app = express()
app.use('/user', user)
app.listen(80, (req, res) => {
console.log('server running at http://localhost')
})
4.2.2 路径匹配
直接写全路径,就是完全匹配,如上面的两个例子。
一些模糊匹配的用法及示例如下:
- 匹配0个或1个字符:在该字符后面加问号(?)如
'/ab?cd'将匹配/acd或/abcd,
1 | app.get('/ab?cd', (req, res) => { |
- 匹配一个或多个字符:在该字符后面加加号(+)如
'/ab+cd'将匹配/abcd、/abbcd、/abbbbbbcd等
1 | app.get('/ab+cd', (req, res) => { |
- 匹配任意字符:在需要匹配任意字符的地方加星号( * )如
'/ab*cd'将匹配/abcd、/abxcd、/abgsuhdjicd等
1 | app.get('/ab*cd', (req, res) => { |
- 对连续多个字符(单词)要求出现一次或者不出现:给这个单词加上括号并在后面加上问号(?)如
'/ab(cd)?ef'将匹配/abef或/abcdef
1 | app.get('/ab(cd)?ef', (req, res) => { |
同理,对加号(+)也可以这样用
- 也可以使用正则表达式:如
/a/将只会匹配a
1 | app.get(/a/, (req, res) => { |
4.2.3 获取路由参数
Rest ful格式的url会把请求的参数附加到url上,如/user/u234/book/2345这个请求中u234和2345均为请求的参数,express提供了以下匹配方式:
- 使用冒号(:)获取相应位置的字符串作为路由参数:如
/user/:userID/book/:bookID其中userID和bookID会成为键名,u234和2345为对应的值,被保存在req.params属性上,{userID: 'u234', bookID: '2345'} - 使用连字符(-)和点(.)连接两个路由参数,如
/user/:from-:to和/user/:from.:to等同于/user/:from/:to
1 | Route path: /flights/:from-:to |
- 可以给路由参数添加正则表达式。
1 | Route path: /user/:userId(\d+) |
4.2.4 路由处理函数
如果是单个路由处理函数,接收两个参数(request和response)
1 | app.get('/example/a', function (req, res) { |
如果有多个路由处理函数,除了最后一个,都接收三个参数(request,response,next),next是一个函数,调用next会将控制权流转到下一个处理函数。
1 | app.get('/example/a', function (req, res, next) { |
也可以使用数组传递处理函数
1 | function cb0(req, res, next) { |
甚至可以组合使用数组传递和单个函数传递
1 | function cb0(req, res, next) { |
4.2.5 向客户端发送数据
介绍常用的几个Response方法,res.end()、res.json()、res.send()、res.set()、res.redirect()、res.status(),完整的响应方法列表见[API参考手册--Response](Express 4.x - API Reference - Express 中文文档 | Express 中文网 (expressjs.com.cn))
- res.end([data] [, encoding]):这是node原生的API,用于结束响应程序,data可以是
string | Buffer; - res.send([body]):发送数据给客户端,
string | Buffer | bookean | Object | Array; - res.json([body]):发送json对象给客户端(可以使用res.send()代替);
- res.status(code):设置HTTP的响应码;
- res.set(field [, value]):设置HTTP响应头,可以是两个字符串或者一个对象(用于设置多个请求头域);
- res.redirect([status,] path):重定向到对应的路径。
4.3 中间件
中间件就是在响应处理函数之前被调用的函数,用于做一些数据验证、数据处理的函数。例如路由处理函数一节中有多个路由处理函数的路由注册,前面的路由处理函数就是中间件,最后一个路由处理函数才会响应数据给用户。
4.3.1 中间件的注册
若要对所有的请求都进行相同的处理,可以使用全局中间件:使用
app.use(mw)的方式进行全局中间件的注册,mw为一个中间件函数,中间件函数接收三个参数,request、response、next,中间件函数执行完响应的逻辑后应当调用next()方法,以将控制权交给下一个中间件,若不调用连接将会被挂起。1
2
3
4
5
6
7const express = require('express')
const app = express()
// 注册全局中间件
app.use((req, res, next) => {
console.log('this is global middleware.')
next()
})若某段逻辑只用于某个请求,可将这段逻辑抽离出来作为路由中间件进行注册:使用
app.get('/mw/ex', mw, (req, res) => {})的方式进行注册,同样接收三个参数,不在赘述。1
2
3
4
5// ......
// 注册路由级中间件
app.get('/example', mwexample, (req, res) => {
console.log('mwexample是一个中间件函数')
})
4.3.2 内置中间件
express内置了几个中间件,介绍几个常用的express.json()、express.static()、express.urlencoded(),完整列表见[API参考手册--express()](Express 4.x - API Reference - Express 中文文档 | Express 中文网 (expressjs.com.cn))
- express.json():将
Content-Type: application/json的请求的请求体转换为对象并挂载到res.body属性上,res.body默认为null;
1 | const express = require('express') |
- express.urlencoded():将
Content-Type: x-www-form-urlencoded的请求的请求体转换为对象并挂载到res.body属性上,res.body默认为null;
1 | const express = require('express') |
- express.static(root[, options]):将root路径设置为静态文件访问,options选项详见[文档API](Express 4.x - API Reference - Express 中文文档 | Express 中文网 (expressjs.com.cn))
1 | const express = require('express') |
4.3.3 中间件分类
- 应用级中间件——全局;
- 路由级中间件;
- 错误级中间件;
- 内置中间件;
- 第三方中间件——npm下载的或自定义的。
4.3.4 错误级中间件
用于捕获错误并对错误进行处理,需要在最后面注册,接收四个参数:err、req、res、next其中err表示发生的错误,没有错误为null,next必须提供,即使不用。
1 | // ...... |
5、生态——常用第三方中间件和插件
5.1 配置cors跨域
安装
1
npm install cors
使用
1
2
3
4
5
6
7
8
9
10const express = require('express')
// 引入cors
const cors = require('cors')
const app = express()
// 简单用法
app.use(cors())
// 为某个路由设置
app.get('/user', cors(), (req, res) => {
res.send('CORS-enabled')
})配置项
1
2
3
4
5
6// cors(options)接收一个对象作为配置
{
origin: '*', // 访问控制允许源,Boolean|String|Array|Function|RegExp
methods: ['GET', 'POST', 'OPTIONS'], // 允许的访问方法,可以是逗号分隔的字符串或数组(见示例)
allowedHeaders: ['Content-Type', 'Authorization'], // 允许的请求头,可以是逗号分隔的字符串或数组
}完整列表见[npm–cors](cors - npm (npmjs.com))
默认(简单用法)配置项如下:
1
2
3
4
5
6{
"origin": "*",
"methods": "GET,HEAD,PUT,PATCH,POST,DELETE",
"preflightContinue": false,
"optionsSuccessStatus": 204
}
5.2 配置解析表单数据
解析
application/x-www-form-urlencoded数据1
2// 使用express内置中间件express.urlencoded({extended: false})
app.use(express.urlencoded({extended: false}))解析
application/json数据1
app.use(express.json())
解析后的数据挂载到req.body
5.3 密码加密
安装
1
npm install bcrypt
使用
1
2
3
4
5
6
7
8
9
10const bcrypt = require('bcrypt')
// 获取hash
// 同步方法
const hash = bcrypt.hashSync('待加密的密码明文', 10) // 第二个参数为随机盐的长度
// 异步方法
const hash2 = bcrypt.hash('jsdfk', 10, (err, hash) => {
if (!err) {
// ......
}
})1
2
3
4
5
6
7
8
9// 比对hash
// 同步
bcrypt.compareSync('密码明文', hash) // true|false
// 异步
bcrypt.compare('明文', hash, (err, res) => {
if (res === true) {
// ......
}
})
完整API参见[npm–bcrypt](bcryptjs - npm (npmjs.com))
5.4 表单数据验证
安装
1
2
3
4// 定义验证规则
npm install @hapi/joi
// 对表单进行数据验证
npm install @escook/express-joi定义验证规则
1
2
3
4
5
6
7
8
9
10
11
12
13
14
15
16
17
18
19
20
21
22
23
24const joi = require('@hapi/joi')
/**
* string() 值必须是字符串
* alphanum() 值只能是包含 a-zA-Z0-9 的字符串
* min(length) 最小长度
* max(length) 最大长度
* required() 值是必填项,不能为 undefined
* pattern(正则表达式) 值必须符合正则表达式的规则
*/
// 用户名的验证规则
const username = joi.string().alphanum().min(6).max(16).required()
// 密码的验证规则
const password = joi.string().pattern(/^[\S]{6,12}&/).required()
// 导出验证规则对象
exports.reg_login_schema = {
// 对 req.body中的数据进行验证
body: {
username,
password
}
}使用验证规则进行数据验证
1
2
3
4
5
6const expressJoi = require('@escook/express-joi')
const {reg_login_schema} = require('../schema/user.js')
// 验证通过后,会把这次请求流转给后面的路由处理函数
// 验证失败,终止请求,并抛出一个Error,进入全局错误级别中间件中进行处理
app.post('/login', expressJoi(reg_login_schema), (req, res) => {})在全局错误级别中间件中捕获验证失败的错误
1
2
3
4
5
6
7
8app.use((err, req, res, next) => {
// 数据验证失败
if (err instanceof joi.ValidationError) {
return res.send('验证错误')
}
// 其他未知错误
res.send(err)
})
5.5 生成JWT的Token字符串
安装jsonwebtoken
1
npm install jsonwebtoken
签名生成token字符串
1
2
3
4
5
6
7
8
9
const jwt = require('jsonwebtoken')
const token = jwt.sign(payload, scretKey, {expiresIn: '10h'})
// 返回给客户端
res.send({
code: 200,
message: '登录成功',
token: 'Bearer' + token
})完整列表见[npm–jsonwebtoken](jsonwebtoken - npm (npmjs.com))
解析token字符串
- 可以使用
jsonwebtoken的verify(token, secret[, options[, callback]])方法 - 使用
express-jwt中间件
使用
express-jwt:安装
express-jwt1
npm install express-jwt
配置
express-jwt1
2
3
4
5const expressJwt = require('express-jwt')
// unless()配置不需要验证的路由
app.use(expressJwt({secret: secretKey}).unless({ path: [/^\/api\//] }))
// 验证失败会返回一个错误,被错误级别中间件捕获- 可以使用
捕获验证失败错误
1
2
3
4
5
6app.use((err, req, res, next) => {
// 省略其他代码...
// 捕获身份认证失败的错误
if (err.name === 'UnauthorizedError') return res.cc('身份认证失败!')
res.send('未知错误')
})
5.6 数据库操作
5.6.1 MySQL
安装
1
npm install mysql
创建连接池对象并导出
1
2
3
4
5
6
7
8
9
10const mysql = require('mysql')
const db = mysql.createPool({
host: 'http://localhost',
user: 'root',
password: 'Lumiaxxxx',
database: 'myblog'
})
module.exports = db使用
1
2
3
4
5
6
7
8
9
10
11
12const db = require('../mysql')
// 使用query()方法操作数据库
db.query(sql, ['占位符的值'], function (err, res) {
if (err) {
return res.send({ status: 1, message: err.message })
}
// 业务逻辑
if (res.xxx) {
// ......
}
})